Here is the link to get the complete set of applications of the Microsoft Office Setup , Norton Setup and McAfee Activate Antivirus for your PC and Mac. You will receive the step by step complete setup for the installation process of the Application.
Activision has announced about Call of Duty: Mobile will be in market this summer to the UK, US, Central Europe, South America and some other regions.
Online multiplayer first-person shooter will be available in Android and iOS version. It will include maps, modes, weapons and characters from throughout the franchise’s previous history, such as Call of Duty: Modern Warfare and the Black Ops series
Developed by Tencent studio Timi, the game will be PVP and free-to-play. And, their is no exact release date for this , you can pre-register for more information and a notification of when it is available on a dedicated website .
Android phone owners can also head straight to Google Play to pre-register there.
The first release will be a public beta in select regions, so look out for it.
Billy Mark is a self-professed security expert; he has been making the people aware of the security threats. His passion is to write about Cyber security, cryptography, malware, social engineering, internet and new media. He writes for Microsoft products at norton.com/setup.
Google announced an update of how Google presents movie and TV shows in the mobile search results Page for the upcoming fall season. The new interface is more graphical and interactive, letting you have more fun swiping through entertainment options from your mobile searches.
When you will search for things like “good shows to watch” or “what to watch” on mobile, you can tap the start button in the “Top picks for you” carousel to begin rating TV shows and movies. You can also search for keywords like “horror movies from the 80s” or “adventure documentaries about climbing,”
This is rolling out now, so you might not see it yet and it is only rolling out in the US.
After that this interface comes up where you can swipe left or right through shows and movies, this helps Google learn what you like and show you better suggestions next time.
Billy Mark is a self-professed security expert; he has been making the people aware of the security threats. His passion is to write about Cyber security, cryptography, malware, social engineering, internet and new media. He writes for Norton security products at | norton.com/setup | norton.com/setup
PUBG Mobile already become a sensation in World wide and fans now have access to a lighter version of the game. PUBG Mobile Lite is especially optimized for low-end phones users with as low as 2GB of RAM in their phone. It is currently available only for Android , their is no word on an iOS version as yet by the creator.
PUBG Mobile Lite launched last week and the app has bagged the number one position on Google Play Store’s in top free games section. This was achieved within the first three days of its launch. PUBG Mobile Lite has been around since last year with availability in select countries. So what is PUBG Mobile Lite and how different is it from the regular version?
Billy Mark is a creative person who has been writing blogs and articles about cyber security. He writes about the latest updates and how it can improve the work experience of users. His articles have been published in many popular e-magazines, blogs, and websites like norton.com/setup
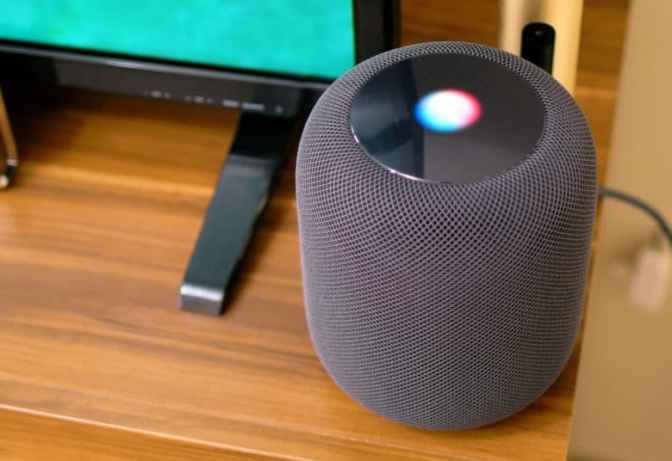
A few months ago, Apple added more features and made some tweaks in AirPod, making it even more fun. You can connect the HomePod to your iPhone and iPad, use Siri, and play music. In case you live in a flat share or with your family and want to add others to HomePod, then you can easily do so. Here’s how you can add multiple users to your HomePod.
Steps to Keep Apple HomePod Music Requests from Affecting Personal Apple Music Recommendations
If you want to keep Apple HomePod music requests from affecting personal Apple Music recommendations, then you need to follow the instructions given below.
First, you have to open the Home application on your iOS device.
After that, you should hold the HomePod.
Then you have to tap on Details.
Later, you should switch the toggle of “Use Listening History” to the “Off” position.
Permit Apple HomePod Speaker Access to the Correct People
You can permit Apple HomePod speaker access to the correct people. Here are the instructions given below.
First & foremost go to the Home application on your iOS device.
After that, you should tap on the Home option.
Then you have to choose the Home Settings icon in the upper left-hand side of the screen.
Thereafter select to “Allow Speaker Access.”
Select to Everyone, Anyone on the Same Network or Only People Sharing This Home.
Choose Require Password for extra security if you have selected “Anyone on the Same Network.”
Now, tap on the Password if you would like to modify the default.
Billy Mark is a self-professed security expert; he has been making the people aware of the security threats. His passion is to write about Cyber security, cryptography, malware, social engineering, internet and new media. He writes for Norton security products at norton.com/setup.
iOS Mail app allows you to check your emails conveniently. When you get a new phone, you have to set the app up and add your email. You can also add multiple email accounts to your iPhone. If you have an iPhone 8, then here is how you can add email accounts to the Mail app.
Set up the Email Account Automatically on iPhone 8
If you want to set up the email account automatically on iPhone 8, then you need to follow the instructions given below.
First of all, open the Settings on your device.
After that, you should tap on Account & Passwords.
Then you have a tap on Add Account.
Thereafter tap to choose the option you would like to from the given email providers like iCloud, Google, AOL, Exchange, Yahoo & Outlook.com.
Later, you should input the email ID, password & further details then tap on Next to proceed.
Now, You have to wait for Mail to confirm the account.
If you want, you can select to synchronize other options or details from the email account like calendars or Contacts which you would like to see on iPhone.
You can set up the email account manually on iPhone 8. Here are the instructions given below.
First, you have to go the Settings on your device.
After that, you should tap on Accounts & Passwords.
Then you should tap on Add Account.
From the given options, choose Other.
Thereafter you have to tap on Add Mail Account.
Later, you should input the name, email ID, password & Account description.
Now, you have to wait for the Mail application to try to locate the email settings & complete the account setup.
Tap on Done.
To Adding More Email Accounts on iPhone 8
If you want to add more email accounts on iPhone 8, then you need to follow the instructions given below.
To get started, with launch the Settings on your device.
After that, you should tap on Accounts & Password.
Then you have to tap on Add Account.
Thereafter, you should choose the email provider.
Later, input the email account details like your email ID, password & other information.
Tap on Next to proceed.
Now, choose the option to synchronize Calendars & Contacts on your according.
Tap on Save to apply the changes & finish the email account setup procedure.
To Set Up Exchange ActiveSync Account on iPhone 8
You can set up Exchange ActiveSync account on iPhone 8. Here are the instructions given below.
To begin with, open the Settings on your device.
After that, you should tap on Accounts & passwords.
Then you have to tap on Add Account.
From the given options, choose Exchange.
Input the email ID.
Thereafter synchronize the contents including Calendars, Reminders, Contacts, Mail & Notes.
Now, When your syncing process has done, tap on Save.
Remove an Email Account on iPhone 8
If you want to remove an email account on iPhone 8, then you need to follow the instructions given below.
First & foremost, go to Settings on your device.
After that, you should tap on Accounts and Passwords.
Go to the Accounts section.
Then you should choose the email account you would like to delete.
Later tap on Delete Account.
Now, tap on Delete from My iPhone to confirmation.
Modify iOS 11 Mail Settings on Automatic Deletion of Messages for Email Account
You can modify iOS 11 mail settings on the automatic deletion of messages for the email account. Here are the instructions given below.
First, you have to navigate the Settings on your device.
After that, you should tap on Mail.
Then you have to tap on Accounts.
Thereafter tap on the email account that you would like to configure.
Tap on Advanced.
You should go down to Deleted Messages section and tap on Remove.
Choose the timeframe you want.
To apply your settings, tap on Done.
By following the instructions mentioned in the blog, you will be successfully able to add email account to iPhone 8 Mail.
Billy Mark is a Microsoft Office expert and has been working in the technical industry since 2002. As a technical expert, Billy has written technical blogs, manuals, white papers, and reviews for many websites such as office.com/setup.
Google Fiber is amongst the top broadband services in the US. It has more than a million users in many parts of the United States Of America, which provides an increasing number of online TV streaming services. Many users face the closed caption issue in the streaming of TV online with Google Fiber. So, if you are one of the users who does not know how to hide and show closed captions in online TV streaming with Google Fiber, then you have come to the right place. Here are some of the best and most effective step by step methods to manage closed captions in no time.
Here’s how to do it by showing & hiding closed captions
It is one of the most basic and effective ways to turn on and off closed captioning on Google Fiber. Showing and hiding closed captioning on Google Fiber is also amongst the fastest methods users apply to do the task in no time. To do so, follow the steps listed below;
First of all, press that Info button available on the remote control you have, and it will open up the Info bar on the screen.
After opening up the Info bar, it will show you whether the closed captions are enabled or not.
If the Info bar has been disabled, press the OK button to toggle the CC option.
After pressing the OK button, you can see the captions on the screen.
It is another method you have to show and hide closed captions if you have a Google Fiber device. Changing closed captions is amongst the best and effective method to resolve the closed captions hide and show the issue. You can enable as well as disable the closed captions according to your preferences. Google Fiber offers you several channels, including CC1, that is most popular in the United States of America. To change closed captions, follow the steps listed below:
Press Info button to summon info bar.
Select the More Info option to see more options from the Info bar by pressing the down arrow.
After opening up the more options under the Info bar section, choose the Closed Captions option and press OK to access all the options.
Now, press the down arrow button to choose that caption channel that gives you the caption you want to see. Try other channels if the chosen one doesn’t work.
After that, the preview will be automatically updated after every change has been made.
Here’s how to do it by formatting closed captions
One can hide and show closed captions by using Google Fiber broadband just by formatting the captions. It may sound unfamiliar but formatting the closed captions works in showing and hiding them. Streaming of your favorite movie or TV show by using Google Fiber broadband connection is quite easy but showing and hiding closed captions is also not a big task at all. Formatting closed captions will allow you to hide and show captions in no time and to do so, follow the steps listed below:
First of all, press the Menu button on your remote.
Now, choose the Settings menu to open it up and press OK.
After that, choose the Closed Captions and press OK to open up the Closed Caption settings.
Choose Customize the Options to enable the Closed captions adjustments.
After adjusting closed caption settings, the preview will be updated in no time.
Billy Mark is a self-professed security expert; he has been making the people aware of the security threats. His passion is to write about Cyber security, cryptography, malware, social engineering, internet and new media. He writes for Norton security products at norton.com/setup.
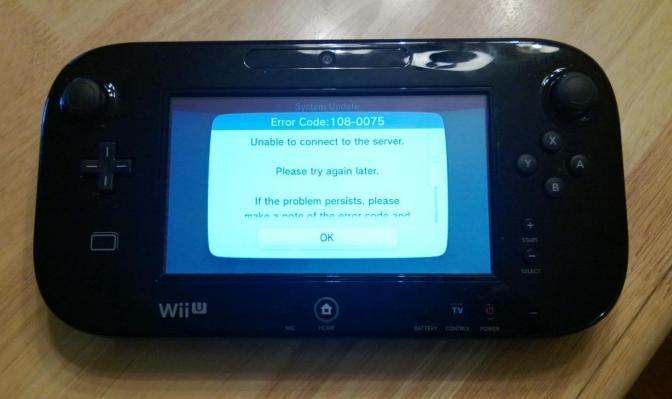
Wii is amongst the best gaming consoles for gaming enthusiasts. Wii devices are created and introduced by Nintendo. It is amongst the most liked and preferred gaming device for game lovers. Wii devices are quite simple and easy to use, and more than a hundred million units of it have been sold around the world. Besides its amazing gaming features and easy portability, several Wii users complain about the occurrence of Error Code 32007 when connecting to an Internet connection. The same error occurs while downloading updates and causes network connectivity issues to the users. If you are amongst the users who are facing the same issue as mentioned in this article, then you have come to the right place. Here are some of the best methods to resolve this 32007 Error Code on your Wii device.
There is a huge possibility that you are facing this error in downloading the updates because your Wii device has been modded and disabled to avoid the mod from being patched. Updating the system won’t help and to fix this, follow the steps listed below;
Open the main screen after launching the console.
Now, press and hold the Reset button for Wii.
Choose System Menu by scrolling down the options from the menu.
After scrolling down, there lies an option Block Online Updates, if it’s enabled, disable it.
Press Select by highlighting the Save Settings option available.
Turn off the power of the Wii and turn it back on.
It is another method you have to resolve this issue. Sometimes the problem lies with the internet connection you are using and not with the Wii device you have. There are chances that the network configuration for your device has not been set properly and it can be the reason that is preventing you from establishing a network on your Wii device. To do so;
Press the A button on the Wii remote to open the main menu after launching the Wii.
Select the Wii Settings from the menu options.
Use that Right Arrow to navigate to the second screen and choose Internet from the options available.
Choose Connection Settings to click on the Connection 1. ‘None’ option.
Click on the Wireless option available.
Choose the Search For Access Point option and click on ‘OK.’
Click on the connection from the list and enter the password of the network to connect it successfully.
Billy Mark is a self-professed security expert; he has been making the people aware of the security threats. His passion is to write about Cyber security, cryptography, malware, social engineering, internet and new media. He writes for Norton security products at norton.com/setup.