Here is the link to get the complete set of applications of the Microsoft Office Setup , Norton Setup and McAfee Activate Antivirus for your PC and Mac. You will receive the step by step complete setup for the installation process of the Application.
Norton Setup is top rated software in area of the Internet and computer security software. Norton setup provide complete scanning of the Computer system for virus and malware files to protect your data and privacy.
Get started with Norton by downloading the setup and installing it on the device. Enter the unique 25-character alphanumeric product key for activation. Check your subscription at norton.com/setup
Highly popular among the PC users the norton.com/setup antivirus software has been eliminating malware, viruses and other kinds of online and offline threats from affecting the performance of a computer for years.It is possible to manage renewal and your subscription in your Norton Setup account. provides a Norton Utility tool to test and optimize your own PC to you. For Instance – Support, We will help you activate the Norton Setup. Follow the step on our official online point norton.com/setup
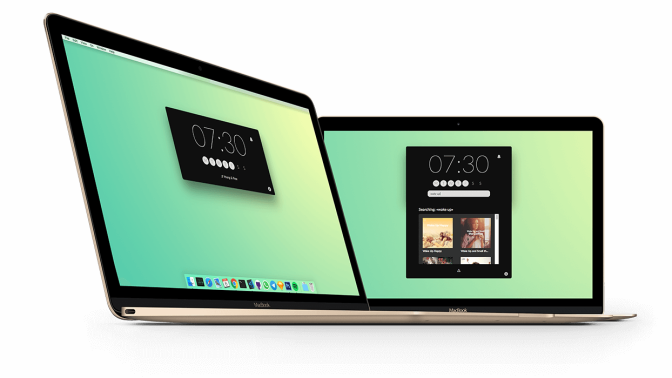
Luckily, your Macbook can be used as an alarm clock as well. The Macbook Alarm can not only help you to wake you up, but also it does help you to remind you about your meetings, appointments, and much more. There are many ways for doing it. Go through the given below instructions for setting the alarm on your MacBook.
Using the Calendar application is among the easiest way for setting alarms.
Firstly, go to the dock.
Then, press on Calendar.
Note: If you are not able to get Calendar on your Dock, then press the Launchpad for searching it in the given list over there, or else you can press the combination Command+Spacebar on the keyboard and write Calendar.
After that, press the date you would want to put an alarm for.
Next, double-click the location immediately with a time of the day you wish to put the alarm. For instance, if you wish to put an alarm for early morning say 5:30 AM, then choose the location exactly between 5 AM and 6 AM.
After that, write the name for the event or reminder that you are adding.
Then, put a location, if you wish, for that specific event you are adding. In a similar fashion, you can also put attachments as well.
Next, press on Add Alert.
After that, press on Alert.
Then, select from the menu whenever you wish to get reminded.
Note: You can press on Custom for putting a custom length of time. If you wish to add plenty of reminders, go to the earlier reminder and click on the + icon next to it.
Finally, you have been able to set an alarm from the
Note: If you want to change your mind, then you can right-click on the reminder and press Delete or else click on the event and hit Delete.
The method of setting the alarm by using Reminders
Firstly, go to Launchpad.
Then, press on Reminders.
After that, press the symbol +.
Next, give a name to the set alarm.
Then, press the i symbol immediately after it.
Note: An alternative way is to right-click on the name of the event.
After that, press on Remind me on a day.
Next, put the time as well as the date for the reminder.
Then, press on Done.
Billy Mark is a self-professed security expert; he has been making the people aware of the security threats. His passion is to write about Cyber security, cryptography, malware, social engineering, internet and new media. He writes for Microsoft products at office.com/setup.
At the present time, few organizations still have old websites which do not work the way they should in newer web browsers. It is worth noting that Windows 10 till now has Internet Explorer 11. I suggest you not to use Internet Explorer whenever you have a choice. The major reason behind it is that it has become outdated with time. IE does not come with sophisticated features and is not too secure. Hence, use it only when absolutely necessary. However, at times you may have to use Internet Explorer to open outdated and old web pages.
The Method Of Opening A Web Page In Internet Explorer From Edge
Note: The users of Microsoft Edge can visit the web pages in Internet Explorer whenever required.
Firstly, go to menu.
Then, press on More Tools.
After that, Open by Internet Explorer.
Lastly, observe that Edge shall start Internet Explorer and you will be able to view the present web page.
The Method Of Launching Internet Explorer On Windows 10
Always remember that it is not compulsory to use Edge for launching Internet Explorer. Basically Internet Explorer can be launched and used normally. In Windows 10, for launching Internet Explorer you need to do the following:
Firstly, press the Start option.
Then, look for Internet Explorer.
After that, click on Enter. Alternatively, you can click on the Internet Explorer shortcut.
Next, by chance if you use Internet Explorer many times- In such cases you want to put it to the taskbar, make a tile of it on the Start menu of the computer or make a desktop shortcut.
There is nothing to panic about if you are not able to see IE in the Start menu of the system. The feature might have been removed.
Go to Control Panel.
Then, press on Programs.
Next, put Windows features either on or off.
Lastly, make sure that IE 11 has been ticked in the given list of features and press OK.
The Method Of Automatically Opening Particular Websites In IE
It is worth noting that for system administrators, Windows 10 provides a special mode known as ‘Enterprise Mode’ feature. Basically the users can put number of websites to the Enterprise Mode list. Observe that whenever the users go to a website on the list in Microsoft Edge, Edge by default launches that web page in Internet Explorer 11.
Billy Mark is a creative person who has been writing blogs and articles about cyber security. He writes about the latest updates regarding mcafee.com/activate and how it can improve the work experience of users. His articles have been published in many popular e-magazines, blogs and websites.
Google Chrome generally provides the option for saving passwords as users enter them into sites. The Android users can access, remove, and send saved passwords by the phone browser. In case you want to retrieve the passwords saved in Chrome from your Android phone, read on.
Firstly, go to the Chrome browser of your cell phone.
If by chance, the application is not placed on the home screen, then go to the app drawer find Chrome.
After that, press on the three vertical dots. Related to the model of the Chrome, it shall be towards the above at the right-hand side or else towards the bottom at the corner of the display.
Next, tap on Settings. It shall be towards the popup menu.
Then, search and press on ‘Passwords.’
After that, in the password menu itself, you shall be able to look at every saved password.
Next, choose the saved password for knowing other details.
To find the hidden password, begin by pressing on the symbol of eye immediately after the hidden password.
Then, before it is presented, users need to provide authentication by using their fingerprint or else the other lockscreen security that has been set up.
Next, observe that the password would now be available in plaintext.
After that, note as soon the verification is done, then the password shall also be copied to the clipboard.
After that, you can delete the saved password by clicking on the trash can-shaped symbol towards the upper side at the right-hand side corner.
Note: There shall be not confirmation option or an option for undoing the act.
The method of exporting saved passwords
Firstly, go to the Google Chrome browser.
Then, press on three dots for accessing the menu.
After that, click on Settings.
Next, click on Passwords.
Then, press on the three dots. It shall be towards the right-hand side of the corner.
After that, press on Export Passwords.
Next, give the authentication with the help of the fingerprint, pattern, etc.
Note that a share sheet shall be displayed, showing plenty of methods for saving and sending the exported document.
Then, choose a safe place for keeping the exported passwords.
Billy Mark is a self-professed security expert; he has been making the people aware of the security threats. His passion is to write about Cyber security, cryptography, malware, social engineering, internet and new media. He writes for Norton security products at norton.com/setup.
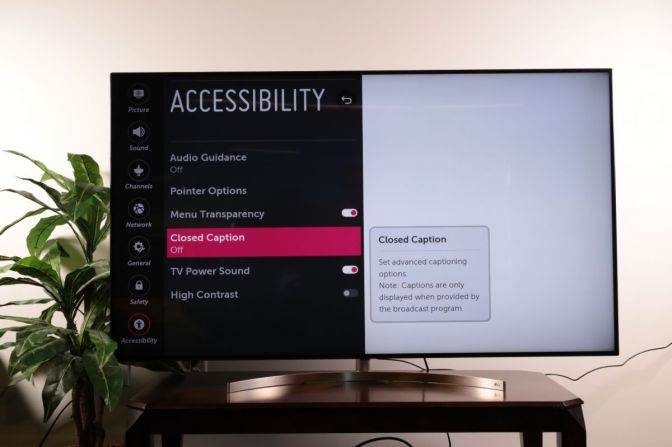
How to Turn On or Off the Captions on Your LG Smart TV
The LG Smart TV has large screen sizes, the HD resolution, and also the many accessibility settings tab to help you customize it. Do you want to turn on or off the caption on your LG smart TV? Then follow the instructions mentioned below.
Here’s how to turn on or off the captions on your LG smart TV
Switch on the LG smart TV.
After that, search for the program from where you wish to get the captions.
Click on the Enter option.
Now, you will get the banner with the details of the show.
After that, you will get the two symbols.
It is given in the upper right-hand side of the screen.
To turn on or off the captions, choose the closed captions symbol.
Now, the LG smart TV will notify you if it is successfully turned on or off by displaying the notification on display.
You will get the captions on the screen after turning it on.
After enabling it, the audio guidance menu starts creating the changes.
After turning on the audio guidance, it displays the settings tab on the screen.
You need to change the speed, pitch, and narrating voice volume.
Steps to Soap Opera Effect
Click on the Home option.
Go to the settings tab.
Click on the Picture column.
Select the Picture Options button.
You will get the last option, which is named as “TruMotion.”
You need to disable it or choose the User option to change the TruMotion settings tab.
Steps to change the picture settings tab
Click on the Settings tab.
It will launch the Quick Settings tab.
Choose the Picture Mode option.
It is the symbol which is located on the top of the menu.
Now, you will get the preset menu list on the screen.
If you want to get more advanced picture settings tab, click on the Advanced Controls option, where you will get the dynamic contrast and also the dynamic color settings tab.
Billy Mark is a Microsoft Office expert and has been working in the technical industry since 2002. As a technical expert, Billy has written technical blogs, manuals, white papers, and reviews for many websites such as office.com/setup.
Gmail is a popular email service used by several people across the globe. Sometimes you might accidentally send an email. GMail offers a feature called Undo Send to help users get the sent email back. In case you wish to turn on the “Undo Send” feature on your Gmail account, then go through the instructions given on this article.
If you want to use the Google Chrome, then you need to click twice on the shortcut symbol.
Enter Hotmail in the text field of the browsing application.
After that, click on the Enter button.
Once you have completed these steps, enter the Hotmail ID in the given box.
Press on the Next option.
Enter the password of the registered account with Hotmail.
After that, press on the Sign-in option.
After logging in to the Hotmail account completely, press on the Gear symbol.
It is given at the right-hand side of the ribbon symbol.
It is named as Outlook.
Press on the Outlook symbol.
Now, you will get the Quick Settings tab on display.
Go down to the URL which indicates “View all Outlook Settings” option.
Press on the Compose and Reply option located in the Outlook Settings menu.
Go down to the Undo Send column.
Click on the Undo Send option.
Billy Mark is a self-professed security expert; he has been making the people aware of the security threats. His passion is to write about Cyber security, cryptography, malware, social engineering, internet and new media. He writes for Norton security products at norton.com/setup.
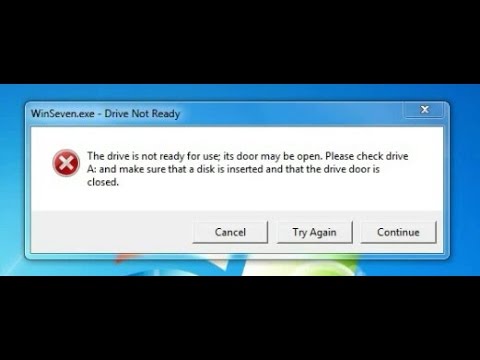
You can face the error the Device is not ready error on your Windows 7, 8 and 10. You need to run the check disk scan, hardware, device troubleshooter, and change the drive letter to fix the error. the procedure to do so is mentioned below.
After going in the control panel, press on the Large symbol.
It is located at the upper right-hand corner of the display.
Press on the Hardware and Sound option.
Choose the Hardware and devices option.
Start the system once you have fixed it.
Check whether this issue is fixed or not.
The additional way to fix this issue is mentioned below:
Go through the software.
Start reinstalling the USB control drivers.
In case you don’t have the latest version, then this will be the reason for this error.
The Windows should be on its latest version.
Open the SFC scan.
Go through the corruptions located in the registry menu.
Try to connect the driver to any other system.
You need to do the restoring process of the computer.
Billy Mark is a self-professed security expert; he has been making the people aware of the security threats. His passion is to write about Cyber security, cryptography, malware, social engineering, internet and new media. He writes for Norton security products at norton.com/setup.
Norton Antivirus Provides overall protection to the Technology Machine and it regularly scans the entire computer system. This antivirus instantly blocks all the online platform which have malware content in it. As all the viruses damage the data in the device, but it removes the infected data by scanning intensely in the device. When you are using any mail account on the default browser, it also scans the entire emails and blocks the harmful links provided in the mail. Norton Setup Antivirus should be updated and upgraded regularly so that you get a proper scanning of the device. To get the Latest Update contact on norton.com/setup
Learn how to find and enter the activation key code by experts and the support team offers assistance 24/7. For more info, visit norton.com/setup.
In the current day and age streaming platforms have become a casual thing for everyone. Be it to watch TV, movies, or even listening to music. We all use one streaming platform or another. While video streaming platforms like Hulu and Netflix differ, there is not much change among music streaming platforms like Apple Music and Spotify.
We usually choose one service and stick by it for years, maybe even decades. So it is pretty evident that all this time while you use the service you would have customized it to your liking. So if you are switching between them, then you would not like to choose your preferences and playlists to wipe away. After all, it takes a lot of effort to create playlists all the years you have been using the service.
Luckily for you, there is a way to transfer all the playlists, artists, albums, and songs you adore. You should be thankful for third-party apps like Soundiiz to provide such an opportunity.
Music streaming platforms make several data points to search, gather, and interchange the data between two or more platforms. You may have an idea if you have ever shared a playlist with a friend.
Several third-party apps are compatible with recognizing the data points and transferring it from one platform to another. You can transfer data from Spotify, Google Music, YouTube Music, SoundCloud, Apple Music, and Pandora.
1. The complete procedure will take merely a couple of minutes if you have a computer for yourself. However, you need to have a Premium Spotify Account to start the process; the free one would not work.
2. Sign up on Soundiiz and create an account by verifying your email.
3. Connect the platforms you want to make the interchange between. It can be any of the above-mentioned platforms. If you are connecting Apple Music to Soundiiz, then you will need to authorize through two=step verification. So make sure that your iPhone is with you.
4. Permit Soundiiz app to gather up all the playlists, which may take a few seconds to minutes depending on the size of playlists.
5. Select all the songs, playlists, albums you wish to switch between the apps.
6. After selecting the files, tap on the transfer option. It looks like two squares and an arrow between them.
7. Choose the service you want to transfer to, Spotify to Apple Music in the post.
8. You can repeat the process among several platforms as per your need.
Billy Mark is a Microsoft Office expert and has been working in the technical industry since 2002. As a technical expert, Billy has written technical blogs, manuals, white papers, and reviews for many websites such as office.com/setup.