Showing posts with label office.com/setup. Show all posts

Sunday, 15 September 2019

PUBG Mobile 0.14.5 Update With Royal Pass Season 9

PUBG Mobile Players received a ‘minor update’ on Thursday, and the latest 0.14.5 update brings the latest Royal Pass Season 9. It include  a few minor improvements like a redesigned of missions’ page, an upgraded Royal Pass sharing page, and a new season timer section as well. Creator Tencent Games says that it  requires only 0.2GB of space to update the game latest version and most important update is that players on different versions won’t be able to invite each other. Thereby, it is recommended to update as soon as possible to enjoy the game.
PUBG Mobile 0.14.5.png

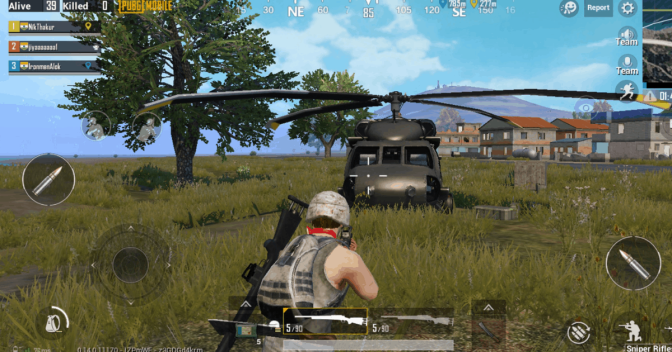
PUBG Mobile game update

The PUBG Mobile 0.14.5 update is rolling out as we speak, and it should arrive in your Google Play Store and App Store listings soon. Royal Pass Season 9 have a new warrior theme with armored wardrobe, updated excited missions, and valuable loot as well. Rewards include a chance to win a journey to PUBG Mobile Club Open (PMCO) 2019 Fall Splits Global Finals as part of the Global Treasure Hunt Challenge.
Author
Billy Mark is a self-professed security expert; he has been making the people aware of the security threats. His passion is to write about Cyber security, cryptography, malware, social engineering, internet and new media. He writes for Microsoft products at office.com/setup.
More to read

Thursday, 12 September 2019

How to Disable Office Background Task Handler

Some Microsoft Office users are complaining about a black context menu that is showing and shutting down after a few minutes. The context menu occurs due to a background executable software which is known as Office Background Task Handler. If you are getting annoyed with the pop up, then this article will help you to disable Office background Task Handler.
How to Disable Office Background Task Handler - Office.com/setup
Source : http://go-office-2019.com/how-to-disable-office-background-task-handler/
Here’s how to disable Office background task handler
·  Updating Microsoft Office
  • Go to the Office app such as the Microsoft Word and PowerPoint.
  • Press on the File option.
  • Choose the Account option.
  • Below the Office Update option, you need to check whether an automatic update is turned on or not.
  • You need to turn off the automatic update, press on the Update Options button.
  • After that, choose the “Enable Updates” option.
  • After the User Account Control is shows on the screen, press on the Yes button.
  • Press on the Update options button once again.
  • Choose the Update Now option.
  • Now, the downloading and installing process of the Microsoft update starts automatically.
  • Start the system again.
  • You need to check whether there is any development or not.
·  Execute Office background Task handler as an admin
  1. Launch the File Explorer menu.
  2. Go to the below-mentioned directory:
C:-> Program Files (x86) -> Microsoft Office -> root
  • Click twice on the Office16 file to launch it.
  • You need to right-click on the officebackgroundtaskhandler.exe.
  • Choose the Properties option.
  • By going to the Properties menu, press on the Compatibility option.
  • Go through the “Run this program as an administrator” option.
  • Press on the Apply option.
  • Press on the OK button.
  • This procedure will save all the changes you have done.
Similar Articles
·  Turn off the Office background Task Handler from your Task Scheduler
  1. Click on the Windows key and R key.
  2. It will launch the Run pop-up menu.
  3. Enter taskschd.msc in the search bar.
  4. Click on the Enter option.
  5. It will launch the Task Scheduler menu.
  6. Press on the Task Schedule Local option.
  7. Enlarge the Task Scheduler Library option.
  8. You just need to press on the greater than symbol showing on the screen.
  9. Choose the Microsoft file.
  10. Enlarge the Microsoft file.
  11. Press on the Office file and search for it
OfficeBackgroundTaskHandlerRegistration.
  1. You need to right-click on the OfficeBackgroundTaskHandlerRegistration section.
  2. Choose the Disable option.
  3. It will hide the task handler.
  4. Now, you will not get the context menu when you use the computer.
  5. You will go back to the context menu in case you install the Microsoft Office latest version.
  6. You need to follow the same steps to turn off the task once again.
Billy Mark is a self-professed security expert; he has been making the people aware of the security threats. His passion is to write about Cyber security, cryptography, malware, social engineering, internet and new media. He writes for Microsoft products at office.com/setup.

Monday, 9 September 2019

How to Install iOS 13 Public Beta 7 to Your iPhone

Want to update your iOS device to iOS 13 Public Beta 7? If yes, you have come to the right place. Here we will explore how to do it quickly without taking any risk. So that if anything goes wrong, you can downgrade back to the current OS. The all-new iOS 13 is full of the latest tech and upgraded features. The interface and appearance of UI are also renewed. The new Apple devices will be even smarter and stuffed with cool features due to iOS 13. iOS 13 will officially release on September 17, 2019.  So if you want to try it out now, then you can sign up for the Seventh Public Beta for iOS 13. Let’s get started.
http://offiiceoffice.com/blog/how-to-install-ios-13-public-beta-7-to-your-iphone/ - Office.com/setup
Source : http://offiiceoffice.com/blog/how-to-install-ios-13-public-beta-7-to-your-iphone/
Should You Install iOS 13 Public Beta?
It depends on you and your interest. Keep in mind that it is a Beta, not an official firmware, so don’t expect that everything will be clean and polished after the update. You may find some bugs and app crashes so be ready for that too. The iOS 13 software is still under development and still requires a little work by Apple.
It is the seventh beta version that means Apple has solved most of the problems, bugs, and errors. Apple is releasing public beta versions to test the software and look for problems. Yes, it is the only reason why Apple is providing iOS 13 public betas. If you are the one who is willing to take a little risk, then you are welcome to try iOS 13 public beta. But if you are the one who only owns a single iPhone and want to keep it safe and can wait will the official version comes then this beta is not for you. However, you can read this article to familiarise yourself with the process of upgrading the OS.
Installing iOS 13 Public Beta 7 to Your Device
Here’s how to get it in your phone. For better understanding, we have split the process into different steps.
Step 1: Making an Archive Backup of your Current Device
It will help you or restore to the previous state if anything happens wrong while upgrading the OS. Here’s how to make one of your devices:
  1. First, install iTunes on your PC if you haven’t already.
  2. Then connect your device with your computer or Mac using a connector cable.
  3. Launch the iTunes app on your PC.
  4. Now find the iPhone icon and then press it to access your device on your PC. (located on the Top-left side of the iTunes application)
  5. Navigate to the Backup option.
  6. Choose the backup location on your PC and then hit the Back up Now button.
  7. Now head to the Preferences menu and select your iPhone from the list. After that, you will be taken to the backup list. Control-click on the backup that you just created.
  8. Hit the archive option and you are done.
More To Read
Step 2: Upgrading to iOS 13 Public Beta Seven
  • First, enroll for the iOS 13 public beta by visiting on the “beta.apple.com” provide the information they want there and follow the on-screen instructions to complete the enrollment process.
  • After the enrollment process, you will be redirected to the profile installation page where you can install the iOS 13 beta.
  • There will be a link Download profile button hit that link. If asked, then allow by tapping the Allow button on your phone.
  • Now press the home button and then go to your Settings app. Now you will see a profile there which will be ready to be installed. Hit the “Profile Downloaded” option.
  • Hit the Install option located near to the profile that you created in the previous step. You will be asked for restarting your device then you have to allow the system to restart your device.
  • After the restart, your iOS 13 beta will automatically start downloading.
Billy Mark is a Microsoft Office expert and has been working in the technical industry since 2002. As a technical expert, Billy has written technical blogs, manuals, white papers, and reviews for many websites such as office.com/setup.

Tuesday, 3 September 2019

How to Add Email Accounts to iPhone 8 Mail?

iOS Mail app allows you to check your emails conveniently. When you get a new phone, you have to set the app up and add your email. You can also add multiple email accounts to your iPhone. If you have an iPhone 8, then here is how you can add email accounts to the Mail app.
How to Add Email Accounts to iPhone 8 Mail - Office.com/setup
source : https://billymarkblog.wordpress.com/2019/09/04/how-to-add-email-accounts-to-iphone-8-mail/
Set up the Email Account Automatically on iPhone 8
If you want to set up the email account automatically on iPhone 8, then you need to follow the instructions given below.
  • First of all, open the Settings on your device.
  • After that, you should tap on Account & Passwords.
  • Then you have a tap on Add Account.
  • Thereafter tap to choose the option you would like to from the given email providers like iCloud, Google, AOL, Exchange, Yahoo & Outlook.com.
  • Later, you should input the email ID, password & further details then tap on Next to proceed.
  • Now, You have to wait for Mail to confirm the account.
  • If you want, you can select to synchronize other options or details from the email account like calendars or Contacts which you would like to see on iPhone.
  • When you are done, tap on Save.
More To Read
Set Up the Email Account manually on iPhone 8
 You can set up the email account manually on iPhone 8. Here are the instructions given below.
  • First, you have to go the Settings on your device.
  • After that, you should tap on Accounts & Passwords.
  • Then you should tap on Add Account.
  • From the given options, choose Other.
  • Thereafter you have to tap on Add Mail Account.
  • Later, you should input the name, email ID, password & Account description.
  • Now, you have to wait for the Mail application to try to locate the email settings & complete the account setup.
  • Tap on Done.
To Adding More Email Accounts on iPhone 8
 If you want to add more email accounts on iPhone 8, then you need to follow the instructions given below.
  • To get started, with launch the Settings on your device.
  • After that, you should tap on Accounts & Password.
  • Then you have to tap on Add Account.
  • Thereafter, you should choose the email provider.
  • Later, input the email account details like your email ID, password & other information.
  • Tap on Next to proceed.
  • Now, choose the option to synchronize Calendars & Contacts on your according.
  • Tap on Save to apply the changes & finish the email account setup procedure.
To Set Up Exchange ActiveSync Account on iPhone 8
You can set up Exchange ActiveSync account on iPhone 8. Here are the instructions given below.
  • To begin with, open the Settings on your device.
  • After that, you should tap on Accounts & passwords.
  • Then you have to tap on Add Account.
  • From the given options, choose Exchange.
  • Input the email ID.
  • Thereafter synchronize the contents including Calendars, Reminders, Contacts, Mail & Notes.
  • Now, When your syncing process has done, tap on Save.
Remove an Email Account on iPhone 8
 If you want to remove an email account on iPhone 8, then you need to follow the instructions given below.
  • First & foremost, go to Settings on your device.
  • After that, you should tap on Accounts and Passwords.
  • Go to the Accounts section.
  • Then you should choose the email account you would like to delete.
  • Later tap on Delete Account.
  • Now, tap on Delete from My iPhone to confirmation.
Modify iOS 11 Mail Settings on Automatic Deletion of Messages for Email Account
You can modify iOS 11 mail settings on the automatic deletion of messages for the email account. Here are the instructions given below.
  • First, you have to navigate the Settings on your device.
  • After that, you should tap on Mail.
  • Then you have to tap on Accounts.
  • Thereafter tap on the email account that you would like to configure.
  • Tap on Advanced.
  • You should go down to Deleted Messages section and tap on Remove.
  • Choose the timeframe you want.
  • To apply your settings, tap on Done.
 By following the instructions mentioned in the blog, you will be successfully able to add email account to iPhone 8 Mail.
Billy Mark is a Microsoft Office expert and has been working in the technical industry since 2002. As a technical expert, Billy has written technical blogs, manuals, white papers, and reviews for many websites such as office.com/setup.

Wednesday, 28 August 2019

How To Set Alarm On Macbook?

Luckily, your Macbook can be used as an alarm clock as well. The Macbook Alarm can not only help you to wake you up, but also it does help you to remind you about your meetings, appointments, and much more. There are many ways for doing it. Go through the given below instructions for setting the alarm on your MacBook.
How To Set Alarm On Macbook - Office.com/setup
source : https://billymarkblog.wordpress.com/2019/08/29/how-to-set-alarm-on-macbook/
The method of setting the alarm by using Calendar
Using the Calendar application is among the easiest way for setting alarms.
  1. Firstly, go to the dock.
  2. Then, press on Calendar.
Note: If you are not able to get Calendar on your Dock, then press the Launchpad for searching it in the given list over there, or else you can press the combination Command+Spacebar on the keyboard and write Calendar.
  1. After that, press the date you would want to put an alarm for.
  2. Next, double-click the location immediately with a time of the day you wish to put the alarm. For instance, if you wish to put an alarm for early morning say 5:30 AM, then choose the location exactly between 5 AM and 6 AM.
  3. After that, write the name for the event or reminder that you are adding.
  4. Then, put a location, if you wish, for that specific event you are adding. In a similar fashion, you can also put attachments as well.
  5. Next, press on Add Alert.
  6. After that, press on Alert.
  7. Then, select from the menu whenever you wish to get reminded.
Note: You can press on Custom for putting a custom length of time. If you wish to add plenty of reminders, go to the earlier reminder and click on the + icon next to it.
  1. Finally, you have been able to set an alarm from the
Note: If you want to change your mind, then you can right-click on the reminder and press Delete or else click on the event and hit Delete.
More to Read
The method of setting the alarm by using Reminders
  1. Firstly, go to Launchpad.
  2. Then, press on Reminders.
  3. After that, press the symbol +.
  4. Next, give a name to the set alarm.
  5. Then, press the i symbol immediately after it.
Note: An alternative way is to right-click on the name of the event.
  1. After that, press on Remind me on a day.
  2. Next, put the time as well as the date for the reminder.
  3. Then, press on Done.
Billy Mark is a self-professed security expert; he has been making the people aware of the security threats. His passion is to write about Cyber security, cryptography, malware, social engineering, internet and new media. He writes for Microsoft products at office.com/setup.

Tuesday, 27 August 2019

How to Turn On or Off the Captions on Your LG Smart TV


How to Turn On or Off the Captions on Your LG Smart TV


The LG Smart TV has large screen sizes, the HD resolution, and also the many accessibility settings tab to help you customize it. Do you want to turn on or off the caption on your LG smart TV? Then follow the instructions mentioned below.
Here’s how to turn on or off the captions on your LG smart TV
  • Switch on the LG smart TV.
  • After that, search for the program from where you wish to get the captions.
  • Click on the Enter option.
  • Now, you will get the banner with the details of the show.
  • After that, you will get the two symbols.
  • It is given in the upper right-hand side of the screen.
  • To turn on or off the captions, choose the closed captions symbol.
  • Now, the LG smart TV will notify you if it is successfully turned on or off by displaying the notification on display.
  • You will get the captions on the screen after turning it on.

How to Turn On or Off the Captions on Your LG Smart TV - Office.com/setup
Source : https://billymarkblog.wordpress.com/2019/08/28/how-to-turn-on-or-off-the-captions-on-your-lg-smart-tv/

You can choose the Settings tab to enable and disable the captions on your LG smart TV. Here’s how:
  • Click on the Home option.
  • Choose the gear symbol.
  • It is located in the upper right-hand side of the display.
  • Now, it will open the TV settings tab.
  • Select the Accessibility column.
  • It is given in the end left-hand side of the screen.
  • Choose the Closed Captions option.
  • By going to the closed captions settings tab, you need to enable or disable it.
  • Select the analog and digital mode.
  • You can customize the digital mode options.
More to Read
Steps to turn on or off the audio guidance
  • Click on the Home option.
  • Click on the TV settings tab.
  • Go through the Accessibility column.
  • Choose the Audio Guidance option.
  • Turn on the audio guidance to create any changes.
  • After enabling it, the audio guidance menu starts creating the changes.
  • After turning on the audio guidance, it displays the settings tab on the screen.
  • You need to change the speed, pitch, and narrating voice volume.
Steps to Soap Opera Effect
  • Click on the Home option.
  • Go to the settings tab.
  • Click on the Picture column.
  • Select the Picture Options button.
  • You will get the last option, which is named as “TruMotion.”
  • You need to disable it or choose the User option to change the TruMotion settings tab.
Steps to change the picture settings tab
  • Click on the Settings tab.
  • It will launch the Quick Settings tab.
  • Choose the Picture Mode option.
  • It is the symbol which is located on the top of the menu.
  • Now, you will get the preset menu list on the screen.
If you want to get more advanced picture settings tab, click on the Advanced Controls option, where you will get the dynamic contrast and also the dynamic color settings tab.
Billy Mark is a Microsoft Office expert and has been working in the technical industry since 2002. As a technical expert, Billy has written technical blogs, manuals, white papers, and reviews for many websites such as office.com/setup.

Thursday, 22 August 2019

How to Transfer Spotify Playlists to Apple Music

In the current day and age streaming platforms have become a casual thing for everyone. Be it to watch TV, movies, or even listening to music. We all use one streaming platform or another. While video streaming platforms like Hulu and Netflix differ, there is not much change among music streaming platforms like Apple Music and Spotify.
How to Transfer Spotify Playlists to Apple Music - office.com/setup
Source : http://offiiceoffice.com/blog/how-to-transfer-spotify-playlists-to-apple-music/
We usually choose one service and stick by it for years, maybe even decades. So it is pretty evident that all this time while you use the service you would have customized it to your liking. So if you are switching between them, then you would not like to choose your preferences and playlists to wipe away. After all, it takes a lot of effort to create playlists all the years you have been using the service.
Luckily for you, there is a way to transfer all the playlists, artists, albums, and songs you adore. You should be thankful for third-party apps like Soundiiz to provide such an opportunity.
Music streaming platforms make several data points to search, gather, and interchange the data between two or more platforms. You may have an idea if you have ever shared a playlist with a friend.
Several third-party apps are compatible with recognizing the data points and transferring it from one platform to another. You can transfer data from Spotify, Google Music, YouTube Music, SoundCloud, Apple Music, and Pandora.
More to Read
How to transfer the playlists:
1.      The complete procedure will take merely a couple of minutes if you have a computer for yourself. However, you need to have a Premium Spotify Account to start the process; the free one would not work.
2.      Sign up on Soundiiz and create an account by verifying your email.
3.      Connect the platforms you want to make the interchange between. It can be any of the above-mentioned platforms. If you are connecting Apple Music to Soundiiz, then you will need to authorize through two=step verification. So make sure that your iPhone is with you.
4.      Permit Soundiiz app to gather up all the playlists, which may take a few seconds to minutes depending on the size of playlists.
5.      Select all the songs, playlists, albums you wish to switch between the apps.
6.      After selecting the files, tap on the transfer option. It looks like two squares and an arrow between them.
7.      Choose the service you want to transfer to, Spotify to Apple Music in the post.
8.      You can repeat the process among several platforms as per your need.
Billy Mark is a Microsoft Office expert and has been working in the technical industry since 2002. As a technical expert, Billy has written technical blogs, manuals, white papers, and reviews for many websites such as office.com/setup.

Monday, 19 August 2019

5 Best Music Apps That Work Without WiFi

Music is something every person on the planet likes, so when it comes to listening to songs, then there are a lot of ways for you to do it. Music apps that let you play your favorite songs are a better choice for you if you like customization and hassle-free music. They also save up data and battery life for you. So why not give them a shot.
Be it an exciting road trip where internet access is limited or a long flight, music can add to the experience and make it even better. The music apps available on the play store can execute several actions such as streaming and downloading music or even both at the same time.
Most of these apps are compatible to run on different platforms i.e., Android and iOS. These apps take your music experience a notch higher by providing features like an equalizer. The equalizer allows you to adjust the sound of the songs through options like Bass boost, pop, retro, studio, and much more.
5 Best Music Apps That Work Without WiFi - Office Setup
Source : http://go-office-2019.com/blog/5-best-music-apps-that-work-without-wifi/
 Best Offline Music Apps
The apps on the list allow you to listen to music without the use of data.
  1. Rocket Player
The first music app on the list is Rocket Player. There are several reasons as to why the Rocket Player is on the first spot of the music apps recommended. Some of them are:
  • Variety of audio formats supported.
  • Ten different equalizer features for fine-tuning the songs to your taste.
  • Embedded song lyrics.
  • Multiple songs selecting option for playlist creation, deletion, or Chromecast support.
The app looks classy with the black theme, and here are the pros and cons of the app.
Pros:
  • Customizable Song Backgrounds.
  • Ten Equalizer tuning option.
  • Videos playback option.
  • Selection option for playing several music tracks.
Cons:
  • Restrictive and plain-looking User Interface.
  • AIMP
AIMP has several distinctions than the Rocket Player such as:
  • Twenty-nine equalizer options for tuning the songs according to your preference.
  • Professional Track Editing feature.
  • Theme Customization.
  • Several audio format support.
The app looks premium with the standard White color theme; however, this can be changed too. Pros and Cons for the app are:
Pros:
  • 29 Equalizer features
  • Live Stream option available through HTTP.
  • Smart song editing tools
  • Playlist created based on folders
Cons:
  • Hit or Miss UI
  • Pi Music player
The Pi music player has a simple interface with some better performing features such as:
  • Track editing feature.
  • Multiple songs selection.
  • Selecting the next tracks to be played.
The app looks good with black and dark theme and can be customized according to users taste. Its Pros and Cons are:
Pros:
  • Classy looking UI
  • Track editing option
  • No ads
  • Low space needed for the app.
Cons:
  • Relatively slow.
  • Pulsar Music Player
The feature for the apps are:
  • Lyrics display.
  • Playback speed adjustment.
  • Ad-free and Chromecast support.
However, the app looks premium; it has its Pros and Cons:
Pros:
  • Premium looking UI
  • Ad-free
  • Small app size
Cons:
  • Average Equalizer.
  • Requires some expansion to be downloaded.
  • JetAudio
More To Read
The first app on the list for iOS for you to use. It has some premium features such as:
  • Option to find tracks on YouTube.
  • AGC for avoiding music fluctuation.
  • CrossFading Support.
With a rather futuristic look, the app gives the vibe of being created in the future. Its Pros and Cons are:
Pros:
  • 10+ Audio format supported
  • Several Track editing and professional editing tools
  • Futuristic looking theme
Cons:
  • Several features have to be purchased.
  • Not for people with no music editing knowledge.
Billy Mark is a self-professed security expert; he has been making the people aware of the security threats. His passion is to write about Cyber security, cryptography, malware, social engineering, internet and new media. He writes for Microsoft products at office.com/setup.

PUBG Mobile 0.14.5 Update With Royal Pass Season 9

PUBG Mobile Players received a ‘minor update’ on Thursday, and the latest 0.14.5 update brings the latest Royal Pass Season 9. It include ...