Monday 29 April 2019

How to Restore Previous Windows Version from Windows 10

Have you upgraded your old Windows because of forced updates, or just upgraded it to try the newer version? But, are you now missing that old simple version and want to go back? Here are some ways that you can use to downgrade from Windows 10.
norton Setup
Source : http://au-norton.com/how-to-restore-previous-windows-version-from-windows-10/
Using the Recovery Method
The new thing about the Windows 10, it has an option in the Settings app by which you can easily get the previous version of your Windows.
However, there is one condition of it, i.e. it needs to be done within the 30 days from the day you updated it. If it is not more than a month, then you can proceed.
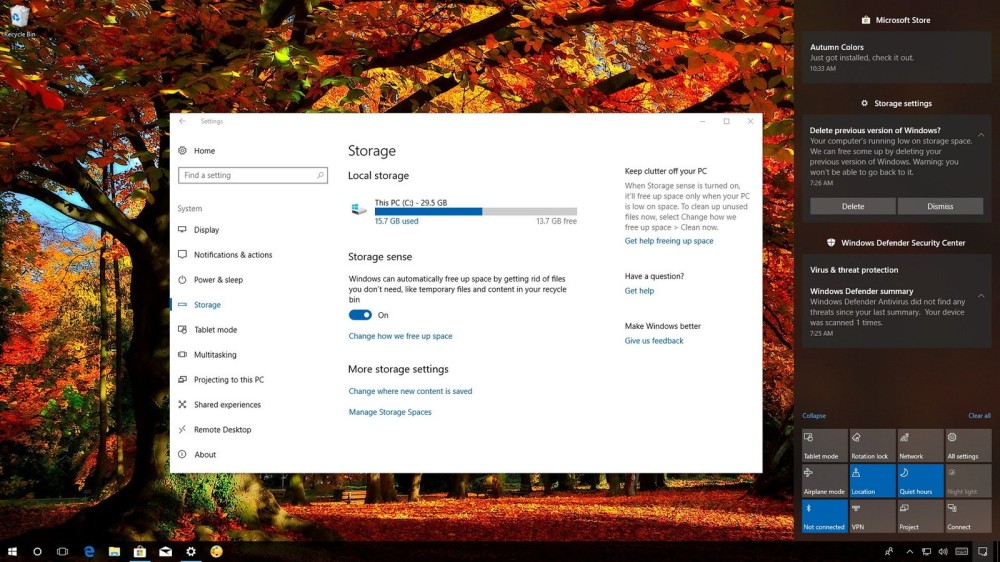
1.    Press ‘Win + I’ or open the ‘Settings’ from the start menu.
2.    Next, click on ‘Update & Security’ at the bottom.
3.    Click ‘Recovery’ from the left side pane.
4.    Now, view the option to get back your old Windows, like ‘Go back to Windows 7/8.1’.
5.    Click the ‘Get Started’ button.
6.    On the prompt, Select a reason for ‘Why are you going back?’
7.    Click ‘Next.’
8.    Now, Read the warning message prompt.
9.    If you’ve any files that are valuable for you and you don’t want to lose, take a backup.
10.    Now, click ‘Next.’
11.    Make sure that you still know the login password of your previous Windows.
12.    Click ‘Next.’
13.    Finally, Windows 10 will thank you for trying it, click ‘Go back to Windows 7/8.1’ button.
Using Third-Party Backup
There is some third party software that can take you to your previous Windows version.
The software you can use:
•    Macrium Reflect
•    Norton Ghost
•    Seagate DiscWizard
•    EaseUs System GoBack
These tools are free and create a copy of your system. With reinstalling the previous versions, it also helps if something goes wrong with your hard drive. If unfortunately, your hard drive gets corrupt, with these tools you’ll get a working position of your system without losing all of your essential data.
Using a previous backup
If it is more than 30 days, then with a backup of old Windows, you can get your older Windows version back.
To perform this method:
Before all, create a backup of your new version of Window and software you installed.
Here is how to do that:
1.    Go to ‘Control Panel’ window.
2.    Here, open the ‘Programs and Features.’
3.    Select the apps.
When you have created a backup of all the files and apps, you want to reinstall or keep. Proceed with the below steps,
1.    Reboot your Windows 10 PC with “Repair disc” or “Windows installation disc or drive.”
2.    Start the installation process.
3.    On the Setup wizard window, click ‘Next.’
4.    Click ‘Repair your computer.’
5.    Now, use the system image and restore your PC.
6.    Click ‘Next.’
7.    Choose the image you want to get back.
8.    Click ‘Next.’
9.    Again, Click ‘Next.’
10.    Click ‘Finish’ to start the recovery process.
When the process gets completed successfully, you’ll see your computer boot with the version of Window you want.
Billy Mark is a self-professed security expert; he has been making the people aware of the security threats. His passion is to write about Cyber security, cryptography, malware, social engineering, internet and new media. He writes for Norton security products at norton.com/setup.
 More to read

How to Cast Audio from Android to Chromecast Audio or Speaker

With Google Home app, cast any type of audio to your Chromecast audio or speakers have Chromecast. Enjoy your favorite track, podcasts, playlists, and more with a boost and high-quality sound on your speaker, precisely the same as you hear them on your phone. Here is how.
norton.com/setup
Source : http://2norton.com/how-to-cast-audio-from-android-to-chromecast-audio-or-speaker/
Begin with:
•    Make sure you’re Android device is running on Android 4.4.2 or newer. If you haven’t updated Android version of your device, then this is the time to do it.
•    Unfortunately, Android audio casting is not supported in iOS or Windows devices.
•    Try not to use the ‘Power Saving Mode’ while casting audio with your Android device, this may affect the performance of audio casting.
•    Microphone permission should be enabled in the Google Play Services app of your Android device to use the ‘Cast Screen or Cast Audio’ feature with the Chromecast Audio without interruption. If it doesn’t have the permission, then the Cast Audio session will disconnect immediately after connecting.
To allow microphone access:
1.    Take your Android device and open settings.
2.    Swipe up the settings screen and tap ‘Apps.’
3.    Select ‘Google Play Services’ from the apps.
4.    Go to ‘Permissions.’
5.    Find the ‘Microphone’ option.
6.    Slide the button and turn on microphone permission.
How to cast audio from an Android device
You can cast audio from any Android device (above Android 4.4.2 version) to Chromecast Audio or Speakers have built-in Chromecast, if they are connected to the same Wi-Fi network. Therefore, make sure the Android device you’re using for audio casting is connected to network your Chromecast Audio or Speaker is.
If not, disconnect from the current connected Wi-Fi and connect it to the network with which Chromecast Audio is connected. Now, follow the below instructions.
1.    Launch the ‘Google Home’ app.
From Google Play Store, you can download or update the app.
2.    On the main screen, tap ‘Menu’ at the top left the corner.
3.    Go to ‘Cast Screen/audio’ from the menu.
4.    Tap ‘Cast Screen/audio’.
5.    Now, choose your Chromecast Audio or Speaker with Chromecast.
Audio casting will start.
How to adjust the casting audio volume from an Android device
1.    Launch the ‘Google Home’ app.
2.    On the main screen, tap ‘Devices’ at the top-right corner to view available Chromecast audio or Speaker with Chromecast.
3.    Scroll down and the find the device card of the Chromecast Audio or Speaker with Chromecast currently casting the audio.
4.    On the device card, tap the ‘Volume’ button.
5.    You’ll see the volume slider.
6.    Tap and move the slider to boost or reduce the casting audio volume.
Adjust the volume as you want and enjoy listening to your favorite track all around room or house.
How to stop audio casting from an Android device
This is not as tricky as the casting audio was, you can stop casting from the casting directly from the notification drawer of your Android device. And, it can also be terminated from the Home app.
To stop audio casting from the notification drawer:
1.    Pull the notification drawer down.
2.    Tap the ‘Disconnect’ option in the notification bar.
To stop audio casting from the Home app:
1.    Launch the ‘Google Home’ app.
2.    Tap ‘Cast Screen/audio’, you may need to open the menu to get the option.
3.    Tap ‘Disconnect’.
Audio casting will stop.
Billy Mark is a self-professed security expert; he has been making the people aware of the security threats. His passion is to write about Cyber security, cryptography, malware, social engineering, internet and new media. He writes for Norton security products at norton.com/setup.

More to read

Tuesday 23 April 2019

How to Redact Text in Microsoft Word

Do you want to redact text in Word document? You can delete text to ensure it is redacted. In case you do not wish to change the entire redacted content, then you can also change the MS Word document into an image sequence.
norton.com/setup - Norton Setup
Source : http://hbnorton.com/how-to-redact-text-in-microsoft-word/
How to Redact a Document by Hand?
  • Go to the Microsoft Word document. Click twice on the Microsoft Word document which you wish to redact so that the MS Word opens on the desktop. Make sure that you can follow these steps only for MS Word documents which are smaller in size. In case you wish to redact a larger document, then you have to store the MS Word document as a picture format.
  • Choose the content which you wish to redact. Press and pull the mouse pointer diagonally the content so that you can start to redact procedure.
  • Press the word count in MS Word document. You will get this in the end left-hand side of the MS Word window. Now, you will get the context menu with the word count and also the character details which are in the MS Word document.
  • Go through how many characters are there in one MS Word document? Near the “Characters” title given in the context menu.
  • Press on the Close button. It is located at the end of the MS Words screen. Now, the context menu gets close.
  • You need to copy the chosen content.
  • Click on the Control and C keys together in case you are using Windows PC to redact in MS Word document.
  • Tap on the Cmd and C keys together in case you are using Mac.
  • Open the “Find and Replace” window.
  • Tap on the Control and H keys together in case you are using Windows PC.
  • Click on the Control and H keys together in case you are using Mac.
  • You need to paste the content into the “Find what” column.
  • Press on the “Find what” section given at the upper side of the context menu.
  • Click on the Control and V keys together in case you are using Windows PC.
  • Tap on the Cmd and V keys together in case you are using Mac.
  • You have to add one of the filters to the “Replace with” column. Press the “Replace with” section near the end of the context menu.
  • After that, enter single-digit decimal numbers for the characters you wish to redact.
  • Press on the Replace all button.
  • Tap on the OK button.
  • You have to follow the procedure again with another content which you wish to redact.
  • You have to add a black color background to text.
  • Save the redacted Word document.
Billy Mark is a self-professed security expert; he has been making the people aware of the security threats. His passion is to write about Cyber security, cryptography, malware, social engineering, internet and new media. He writes for Norton security products at norton.com/setup.

More To Read


How to Search Contents of Files in Windows 7

Are you facing difficulty in locating a file stored in your computer?  If you are struggling with Windows search, then do not worry. You can make use of the Windows inbuilt search feature for this purpose. Here’s how to search contents of files in Windows 7
mcafee.com/activate
Source : http://retailcard-activation.com/how-to-search-contents-of-files-in-windows-7/
How to Use File and Folder Search Options?
  • Go to the file and folder which you wish to search. If you wish to search for any particular file and folder for the content of the file, then you have to launch the folder.
  • In case you wished to search the folder by going to the Downloads folder, then you have to launch the Documents.
  • Press the search box. You will get the box in the top right-hand side of the screen.
  • Type the “content search.” You have to enter the “content:” into the text field.
  • Type the content search term. Once the “content:” dialog box start appearing on the screen, enter the word or phrase which you wish to add to the search contents of files in Windows 7.
  • Go through the results displaying on the screen. Every file which is showing in the search box will instantly index by content, and you have to view the desired files and folder in any place near the upper side of the screen in case you have typed the word and phrase properly.
How to Enable Content Searching for All Files?
  • Go to the Start menu. Tap on the Windows symbol given in the end left-hand side of the display. Now, the start window gets open on display.
  • Enter “change search options for files and folders” into the see more results box. It is located at the end of the Start menu.
  • Press on the Change search options for files and folders option. It is located near the upper side of the Start menu.
  • Go through the “Always search file names and contents” column. You will get this column in the “When searching non-indexed locations” tab of the display.
  • Tap on the Apply button and after that, press on the OK button. You will get both the buttons at the end of the display. After going through this procedure, it will automatically save the changes you had made in settings.
The methods mentioned above will help you easily find content in files stored on your Windows 7 computer.
Billy Mark is a self-professed security expert; he has been making the people aware of the security threats. His passion is to write about Cybersecurity, cryptography, malware, social engineering, internet and new media. He writes for Mcafee products at mcafee.com/activate

More to Read


Monday 22 April 2019

How to Use Vacation Mode in Your Smart Home

If you are going out for a vacation, you must plan things accordingly. It includes taking care of the home that you are leaving for a while as well. When smart home devices are installed in your home, you don’t have to worry much about your home as they take care of it entirely. But many smart home devices such as Google Home hub and Nest thermostat come with a kind of vacation mode feature that you need to enable when you are going out for a vacation. You can find various devices in the market that have the same vacation mode type of features.
Source : http://au-norton.com/how-to-use-vacation-mode-in-your-smart-home/

Here are a few of them:
August smart lock
You get the option to set up a guest account in the August smart lock so that a known person can enter and take care of your house.
Wi-Fi security cameras
Most of the Wi-Fi security cameras have motion detection feature that alerts the owner whenever any movement is detected on the camera. So, if you place the camera on the entrance gate, it is possible to identify thieves quickly. Make sure you set the security camera in this way.
Nest Thermostat
You can save energy while you go away from home through the Away mode in the thermostat. As you don’t have to either keep the house cold or warm. Adjust the same setting accordingly before leaving your home.
WeMo Plugs and Switches
There is an option to configure Away Mode in WeMo plugs and switches also. They allow you to turn them on or off on a schedule while you are not present. Hence, don’t forget to configure them too.
D-link leak detector
Water pipe damage can cost you a lot. Through the D-link leak detector, you can save that cost. When you configure it accordingly, it alerts you, and you can let your neighbors know about the issue.
For betterment, even if the devices don’t have a vacation mode or type of features, you need to adjust their settings accordingly while you are leaving.
Use IFTTT applets
As it is hard to program all the smart home devices in your home correctly, you can choose to control them with the help of cloud services. IFTTT comes as the perfect solution as it integrates with most of the smart home devices present in the market and comes as free cloud service. It also has a mobile app that will be ideal for using while you are away. If you don’t own an IFTTT account, you will have to create one first. Here’s how you can set up IFTTT:
1. Open IFTTT and go to My Applets. Then, hit the New Applet option.
2. Now, choose the ‘this’ option and enter ‘time’ in the search column.
3. Move ahead with the process by selecting ‘Date & Time’ and then ‘Every day at’ option.
4. Set the time accordingly and click on Create trigger once you are done.
5. Click on ‘that’ button and type in the brand name of the device you own, for example, WeMO.
6. Choose the Turn on option now.
7. Then, select the switch that you desire to turn on and click on Create Action.
8. Enable the applet by clicking the Finish button.
After you implement these steps correctly, the selected lights will turn on every day at the same time. For turning off the same light, you will have to repeat the same process and select turn off. If you wish to create an illusion are that someone is there while you are on vacation, you can create various applets for turning lights on and off.
Billy Mark is a self-professed security expert; he has been making the people aware of the security threats. His passion is to write about Cyber security, cryptography, malware, social engineering, internet and new media. He writes for Norton security products at norton.com/setup.

How to use Instagram Story Highlights

Instagram is a great medium to connect with people you know and love. It lets you share your pictures and videos as well as access others too. There are various great features in this social media platform that you can enjoy in your day to day life. One of the best features from Instagram is stories update. You can tell the regular stories through pictures and videos using Instagram stories.
Source : http://2norton.com/how-to-use-instagram-story-highlights/

Though, the stories in Instagram are only available for 24 hours and disappears after that. If you wish to make them visible for long, you can use the Instagram story highlights. It is another excellent feature for showcasing your best Instagram stories. Let’s discuss the Instagram story highlight in the comprehensive manner below.
Instagram Story Highlights
As Instagram stories disappear after 24 hours, there is an option to highlight the stories users want to show forever on their profile. You can select a bunch of stories and create a dedicated folder to show them to others. The highlight feature gives you an option to choose a custom image for highlighting chosen stories and give it a particular name. After you create the highlight, they show on your profile just under the profile photo and bio text. Show your favorite memories correctly with the Instagram story highlights.
Creating Instagram Highlight
You can create an Instagram Story highlight through two ways. One is through selecting the active Instagram story and another by choosing from archived stories. Here’s how you can create a highlight through both ways:
Using the active story
If you wish to use active story in your Instagram highlights, follow these steps
1. Go to the active story of your Instagram profile.
2. Now, find the Highlight option present on the bottom and tap on it.
3. Then, tap on the plus icon for creating a new highlight.
4. Give the highlight an ideal name to justify the story.
5. Tap on the Add button present in blue to successfully create the highlight.
Once you implement these steps, your followers can see the highlight on your profile photo and in your profile later on.
Using archived stories
For adding Instagram stories from your archived stories, go through these steps:
1. Tap on your Instagram profile and then on the Story Highlights option available below bio.
2. Now, touch the plus icon to move ahead with the process.
3. You will see all your stories from the past. Select the desired ones that you want to show in the Highlight and tap on the Next option.
4. If you wish to choose another cover for your highlight, tap of Edit cover. Select any other story as an icon or upload one.
5. You need to give a perfect name to your Highlight now.
6. If you are using Android, tap on Done. The iPhone users need to tap Add to add highlight successfully.
Adding more stories in current Highlight
It is even possible to include more pictures and videos in your Highlight. Here’s the process:
1. Press and hold your Highlight for a while.
2. Select the first option, Edit Highlight, from there.
3. Tap on Add and choose the stories that you wish to include and then tap on Done.
Your Highlight will be edited successfully, and selected stories will be added.
Importance of Instagram Highlights
For brands, Instagram has become an excellent tool for connecting with people all around the world and boosting their products. It is essential for them to keep their pages updated with beautiful and engaging stories and posts. They can tell a lot about themselves by posting relevant stories and creating highlights from time to time. Even those who don’t follow you, might check your highlights and give you a follow after seeing them. So, the Instagram highlight is very useful for letting your new followers know about your previous activities.
Billy Mark is a self-professed security expert; he has been making the people aware of the security threats. His passion is to write about Cyber security, cryptography, malware, social engineering, internet and new media. He writes for Norton security products at norton.com/setup.

Tuesday 16 April 2019

Top 6 Touch Screen Games for Windows 10 Devices

You can get various great games in the Microsoft Store on Windows 10. But when it comes to touch-based games, there are very few ones. The list of best five touch screen games on Windows 10 is given below, check it out!
Top 6 Touch Screen Games for Windows 10 Devices
Source : Top 6 Touch Screen Games for Windows 10 Devices
1. Fallout Shelter
Fallout Shelter comes as one of the best free touch-based game available in the Microsoft store. It is already a renowned apocalypse simulation game, which asks you to manage nuclear bunker inside it. You need to create the perfect vault and grow your community to move ahead in this game.
2. Minecraft
Build your dream castle and explore other adventures correctly with the Minecraft game. It is considered as one of the best touch-based games for Xbox One, PC and even Windows tablets. However, you need to pay a dedicated amount to enjoy this game entirely in your device.
3. Bridge Constructor
If you love physics and your passion is construction, the Bridge Constructor is the perfect touch-based Windows game for you. It comprises of the physics-based puzzle and gives you the task to construct bridges. You need to run vehicles over the bridge after constructing them to check their durability.
4. Candy Crush Saga
Candy Crush Saga is already very popular among users on different platforms. This puzzle game is available for free and comes as a must try touch-based game for Windows 10 users as well. You need to tap the same colored candies to move forward with the levels in this game.
5. Halo: Spartan Strike
One of the most underrated touch-based game is the Halo: Spartan Strike. It is shooting game with ideal weapons and enemies. Get this game in your touch devices and challenge your enemies to fight you!
6. Game Dev Tycoon
If you like to stay organized and manage things in real-life, you can try the same in the virtual world through Game Dev Tycoon. It is an ideal management game that allows you to develop your bedroom, grow your business, hire staff and do a lot more. This addictive game is not free though in the Microsoft Store.
Use these touch-based games in your Windows 10 devices and make the most out of your leisure time!
Conclusion
People all around the world use Windows 10 devices. The Microsoft Store provides plenty of great games but very less touch-based games. This blog share information related to those very few touch-based Windows 10 games.
Billy Mark is a self-professed security expert; he has been making the people aware of the security threats. His passion is to write about Cyber security, cryptography, malware, social engineering, internet and new media. He writes for Norton security products at norton.com/setup.

Top 5 Best URL Shorteners in 2019

Google’s URL shortening service Goo.gl was one of the best and renowned services for creating shortened URLs. However, the service is no longer available for use as the tech-giant has discontinued it for new users. Its existing users will be able to use the same service for one more year though. Shortening your URLs for sharing on different platforms is not a matter of concern as there are plenty of options for you. The below-given URL shorteners are the best tools after discontinuation of Google’s URL shortening platform.
Top 5 Best URL Shorteners in 2019
Source : Top 5 Best URL Shorteners in 2019
Here are the best URL shorteners for you:
1. Bit.ly
You might have already heard about or used Bit.ly, which comes as one of the best URL shortening tools. It is super easy to use this tool for creating short URLs. You need to paste the desired link in the asked section and ready to go. If you become a registered member, you get various new options such as you can check statistics of your links, create campaigns and customize links in your way. Manage your social media properly by sharing organized URLs with the use of Bit.ly.
2.  TinyURL
TinyURL is another best URL shortener for long URLs. It lets you both shorten as well as customize your URLs perfectly. You can even use this tool as an extension in your Google Chrome or Mozilla Firefox browser. If you want to generate a short URL quickly as an anonymous user, this URL shortening tool is the best for you. It has been winning the hearts of users since 2002 with its exceptional service. Get this free tool in your device and share links in the best way possible.
3. Ow.ly
Ow.ly used to be a particular free tool like URL shorteners mentioned above in this list. But, not anymore as it is part of Hootsuite now. If you don’t know about Hootsuite, it is one of the best social media management tools available in the market currently. You can easily use the Ow.ly for free by going to the Hootsuite dashboard. Hence, it is necessary to have Hootsuite account for using this URL shortener.
4. Buff.ly
Buff.ly is almost the same as Ow.ly. The only difference is that it comes with a different social media management tool that is Buffer. It also asks you to sign with a Buffer account and use this free tool for shortening URLs. Find the Buff.ly link shortener in the Buffer dashboard and get started with link shortening process. Manage your social media well with Buffer and utilize Buff.ly for shortening all the relevant URLs.
5. Is.gd
Get a short link of any URL swiftly through Is.gd. Just click on Is.gd, paste the long URL, get the desire short URL to use everywhere on the internet. It also gives you the option to customize the URL accordingly after creating.
All in all, these are the best URL shorteners that will give you the best results in 2019!
Billy Mark is a self-professed security expert; he has been making the people aware of the security threats. His passion is to write about Cyber security, cryptography, malware, social engineering, internet and new media. He writes for Norton security products at norton.com/setup.

PUBG Mobile 0.14.5 Update With Royal Pass Season 9

PUBG Mobile Players received a ‘minor update’ on Thursday, and the latest 0.14.5 update brings the latest Royal Pass Season 9. It include ...