Thursday, 4 April 2019

How to Change the Download Folder in Chrome

When you wish to download any document or file by using the Google Chrome browser, the downloaded file will get stored in a particular folder. In case you want to change the downloaded file location for organizing the downloads, for getting space in the system hard drive, or for saving the downloaded documents or files in the cloud folder like Dropbox. You can also allow Google Chrome to ask you to select the download location whenever you download any document or file from it.
How to Change the Download Folder in Chrome
Source : How to Change the Download Folder in Chrome
Steps for Changing the Default Download Folder
In case you wish to adjust the default download folder of Google Chrome, then you need to follow the steps mentioned below:
•    Go to the Google Chrome located in the top right-hand side of the screen, choose the drop-down menu which resembles “Three dots” symbol and after that, select “Settings” option.
•    Go to the end of the webpage and after that, choose the “Advanced” button to get the “more settings” option.
•    Go to any folder in the computer which you wish to use that folder as your default download folder and after, that, click on the “Select folder” option.
•    When you use Google Chrome to download any document or file, then it will be going to download folder.
Steps for Finding the Downloaded File
For finding the location where you wish to download any document or file from the Google Chrome, then go to the searchable pull-down list of all the downloaded documents or files. Follow the steps given below to find the downloaded file:
•    Choose the drop-down menu which resembles “Three dots” symbol located in the top right-hand side of the Google Chrome, and after that, select the “Downloads” folder.
•    The list shows the downloaded files, each link which was downloaded from and also the “Show in folder” option.
•    Choose “Show in folder” for opening the downloads folder which includes all the files which you had downloaded.
Ask Where to Save Downloaded Files
You have to specify the Google Chrome where you wish to save the downloaded file on your system.
•    Choose the drop-down menu which resembles “Three dots “symbol provided in the top right-hand side of the Google Chrome and after that, select the “Settings” option.
•    Choose the “Advanced” option at the end of the display and after that, go down to the “Downloads” column.
•    Enable the “Ask where to save each file before downloading switch.
•    You have to select the download folder every time while downloading any document or file from the Google Chrome.
How to Allow Downloading Multiple Files in Chrome?
You have to permit Google Chrome for downloading multiple documents or files from the same site. Here’s how:
•    Choose the pull-down menu which resembles “three dots” symbol given in the top right-hand side of the Google Chrome and after that, select the “Settings” option.
•    Choose the “Advanced” option located at the end of the display.
•    Below the “Privacy and Security” button, you have to choose the “Content Settings” option.
•    Choose the “Automatic downloads” located on the “Content settings” display.
•    Enable the “Ask when a site tries to download files automatically after the first file” switch.
•    You have to permit Google Chrome before you start the downloading of various files from any particular website.
Billy Mark is a self-professed security expert; he has been making the people aware of the security threats. His passion is to write about Cyber security, cryptography, malware, social engineering, internet and new media. He writes for Norton security products at norton.com/setup.

How to Block Users on WeChat Mobile App

If you have an account on WeChat and any user on the WeChat account is disturbing or annoying you, then you can block them. In case you wish to block a contact on WeChat, then go through the instructions mentioned below.
How to Block Users on WeChat Mobile App
Source : How to Block Users on WeChat Mobile App
Steps to Block Someone on WeChat
In case someone is very annoying in your WeChat account, and you decided to block them, then you have to follow the steps mentioned below to block that contact from the WeChat account:
•    Go to the WeChat application on the Android or iPhone.
•    Choose the contact you wish to block from the WeChat account.
•    Choose the “Three dots” drop-down menu located in the upper right-hand side of the screen.
•    Then, choose “Moments” options.
•    After that, choose the “Add to block list” option.
In case you wish to view which contact is in the block list on the Android or iPhone, then you have to follow the steps mentioned below:
•    Choose the “Settings” option located on the WeChat account.
•    Choose the “Privacy” option.
•    After that, tap on the “Block list” button to view which contact is in the Block list in the Android or iPhone.
How to Mute Someone in WeChat?
If any contact on your WeChat is very disturbing and you don’t want to get any notification from them, then you do not have to worry just follow the steps given below to mute chat notification from a specific contact:
•    Click on the “Me” button.
•    After that, click on the “Settings” option in the WeChat.
•    Choose the “Notifications” option.
•    You have to enable the “Notification” option.
If you wish to mute the WeChat notifications in a specific conversation on the account, then follow the steps given below:
•    Go to the conversation of that contact whose chat notification you like to mute on the WeChat account.
•    Choose the “Three dots” symbol.
•    Choose the “Settings” option.
•    Now, you can click on the “Mute Notifications” option.
•    The chat notification from a specific contact is muted now.
In case you wish to mute the notifications of the WeChat group, then follow the steps given below:
•    Choose the WeChat group symbol given in the upper right-hand side of the group conversation.
•    Choose the “Mute Notification” option.
•    Now, the group chat notification is muted on the WeChat account.
•    All these steps are to mute the group notification instead of a specific contact.
How to Manage the Privacy Settings on WeChat?
Here are the steps given below to manage the privacy settings on the WeChat account in case you don’t wish to share the moments with a specific person:
•    Go to the WeChat application on the Android or iPhone.
•    Choose the “Privacy” option.
•    Click on the “Don’t Share My Moments” button.
•    Choose the “Plus” symbol for adding the contact in the “Don’t Share My Moments” list.
•    Choose the contact you wish to block to view the moments you posted.
•    After that, tap on the “OK” button.
•    Press on the “Done” button.
How to Unfriend a Contact in WeChat?
Here are the steps are given below to unfriend a contact in WeChat:
•    Go to the WeChat app.
•    Choose the “Contacts” from the WeChat account.
•    Choose the “three dots” symbol given in the upper right-hand side of the screen.
•    Choose the “Delete” button to remove the contact from the WeChat account.
•    You are not able to reset these action, but you can send them the request again whenever you want.
Billy Mark is a self-professed security expert; he has been making the people aware of the security threats. His passion is to write about Cyber security, cryptography, malware, social engineering, internet and new media. He writes for Norton security products at norton.com/setup.
How to Convert PowerPoint Files to Google Slides Format

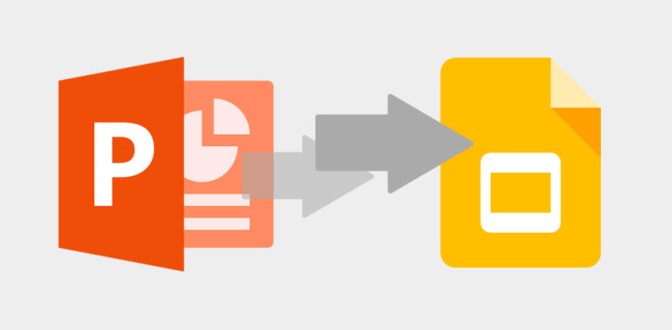
In case you are using Google Slides and wish to start editing on your PowerPoint files, then this is a very simple procedure. Here are the steps to convert the PowerPoint files to Google Slides format.
How to Convert PowerPoint Files to Google Slides Format
Source : How to Convert PowerPoint Files to Google Slides Format
How to Drag and Drop PowerPoint Files into Google Slides?
Go through the process in case the PowerPoint document is given in the system drive:
•    Go to the “Google Docs.”
•    In case you had not chosen Google Slides which is provided in the top left-hand side of the app and after that, choose the pull-down menu which resembles “three lines” symbol.
•    By going to the pull-down menu, select the “Slides” option.
•    Choose the “File Picker” symbol located in the top right-hand side of the app.
•    Select the “Upload” option provided in the “Open a file” display. You will get the column named as “Drag a file here.”
•    Go to the folder wherever you had saved the PowerPoint document.
•    You have to drag a PowerPoint document inside the “Drag a file here” column.
•    You will get an “Uploading” text after the documents get uploaded on the system.
•    After that, the PowerPoint document will start showing in the Google slides window and you can start working on it as you daily do.
How to Upload a PowerPoint Files into Google Slides Format?
Go through the additional procedure mentioned below in case the PowerPoint documents will not able to save on the system drive:
•    Go to the “Google Docs.”
•    In case the Google Slides is not chosen yet which is located in the top left-hand side of the app, you have to choose the drop-down menu which resembles “three lines” symbol.
•    By going to the drop-down menu, select the “Google slides.”
•    Choose the “Create new presentation” provided in the end right-hand side of the display. It resembles a plus icon.
•    Now, the Google slides edit window will get open on the desktop.
•    Choose the “File” option provided in the top left-hand side of the screen.
•    Choose “Import slides” option.
•    Select the “Upload” option given in the checkbox.
•    After that, tap on the “Select a file from the computer” option.
•    Go to the PowerPoint file and choose that file.
•    Once the PowerPoint file completes its uploading procedure, you can choose whichever Google Slides you wish to access. You can go through this procedure by choosing every Google Slide or by choosing “All” option given on the top right-hand side of the display.
•    After completing all the steps mentioned above, choose the “Import slides” option given in the end right-hand side of the display.
•    The PowerPoint presentation will start showing in the Google slides editing window, and you can start working on PowerPoint as you regularly do.
How to Open a PowerPoint File from Google Slides?
You can do this procedure through the PowerPoint files provided on the system drive.
•    Go to “Google Drive.”
•    Choose the “New” option located on the top left-hand side of the screen.
•    After that, choose the “File Upload” option.
•    Go to the PowerPoint file you wish to start uploading and choosing it.
•    You will get an uploading text and after that, the PowerPoint file will start showing in the Google Drive pull-down menu list. Choose the PowerPoint file.
•    Select the “Open with Google Slides” located at the upper side of the display.
•    The presentation which you had converted will start showing in the Google slides editing window and start using the PowerPoint.
Billy Mark is a Microsoft Office expert and has been working in the technical industry since 2002. As a technical expert, Billy has written technical blogs, manuals, white papers, and reviews for many websites such as office.com/setup.

Tuesday, 2 April 2019

10 Reasons to Use Linux over Windows

Windows, macOS, and Linux are the primary operating systems that are being used in today’s world. If you have never used Linux in your life, you might consider Windows or macOS as the best operating system. But, the truth is Linux is far better than Windows and macOS. You will believe the same after knowing about the benefits that Linux provides. Here are the main reasons that prove Linux is the best operating system:
1. Customizable interface
Both Windows and Linux are simple and easy to use, but the interface of Linux is fully customizable. You get plenty of themes as well as beautiful icon themes that you can use according to your choice. The best thing about Linux is that it allows you to use Conky, which shows you live system information related to your computer.
norton.com/setup
Source : http://2norton.com/10-reasons-to-use-linux-over-windows/
2. Utmost security
When it comes to the safety of your data, Linux is one of the most secure operating systems. Regardless of being an open-source platform, it is not as vulnerable as Windows. You must think about how an open-source OS can be more reliable? Because most of the Windows users are not experienced with using it and become an easy target for the ones targeting to hack. However, it is not the same in Linux, as most of its users are tech-savvy.
3. Open source platform
Linux comes entirely as an open source project. The source code in this operating system is public and allows everyone to tweak and improve it. So, if you are interested in knowing how things work behind a program, the open source nature of this platform makes it a perfect solution for you.
4. Runs smoothly on older computers
To use most of the genuine Windows version in a computer, you need ideal hardware requirements. But, Linux can even run on a low-end machine with decent specifications. Though, that doesn’t mean an old processor couple with 256 RAM system.
5. Best for programmers
You can quickly learn and practice most of the programming languages such as C, C++, Java, Python, and more through Linux. It supports plenty of applications that are helpful for programming and not properly operable in Windows. There are native libraries, which are specially developed for Linux users. Millions of Linux users appreciate the package manager feature as well. The servers are also easily manageable in Linux. All in all, Linux offers everything that programmers demand.
6. Free for use
You don’t have to pay a hefty amount to use all the features like Windows. Instead, it is free, and you don’t have to spend a penny to enjoy all the advanced things that this operating system provide. Save the same money that you will pay in buying an operating system like Windows and use it for any other productive purpose. You get the option to enhance the specifications of your existing system with the same money or even buy different necessary types of equipment that you desire to have in your day-to-day life.
7. Private
If you check the privacy settings in Windows 10, you will see everything is enabled by default. It means the data that is stored inside your device is not private at all. Microsoft is collecting all of your information; however, the company will never reveal the same to its users and public. Linux doesn’t collect your data at all, and you don’t have to worry about getting additional tools to protect everything that you have on your computer.
8. Reliable
Like Windows, Linux will never bug you to reboot your computer after completing any process such as installation, uninstallation, updating, and more. Instead, you can continue doing what you were doing after completing a specific process. Windows is getting annoying with the passing time as it crashes and slows down the process in your computer. Linux is reliable with servers as well. Most of the supercomputers operate on Linux, and even tech giants like Facebook and Google use Linux.
9. Active community users
You can get an ideal response to any major or minor problem you are facing on Linux through Linux forums. The Linux users stay active on the forums to get updated and are always ready to help others with any problem. In Windows, you have to find a thread online where the answer to your question is given.
10. Ideal for gamers
A vast range of computer play games on computers. The number of players might be more in Windows but those who prefer high-end gaming experience, play on Linux. Linux games are more advanced as its gaming community is increasing from time to time.
Conclusion
Both Windows and Linux are ideal operating systems. Linux is, however, a step ahead of Windows in most of the things. This blog provides you benefits of Linux and lets you know how Linux is better than Windows.
Billy Mark is a self-professed security expert; he has been making the people aware of the security threats. His passion is to write about Cyber security, cryptography, malware, social engineering, internet and new media. He writes for Norton security products at norton.com/setup.
How to Get a Complete Microsoft experience on Android Phone

If you love Windows Phone and Windows 10 features but use an Android phone, you can make your Android phone look like a Windows phone. You must be wondering, how? The answer is that you can exactly replicate the windows mobile operating system, which is almost-dead now but can customize your Phone accordingly. You can add custom live wallpaper with the use of Nova Launcher app to get the look and feel of Windows 10 in your phone.
How to Get a Complete Microsoft experience on Android Phone
Source : http://sitemcafee.com/blog/how-to-get-a-complete-microsoft-experience-on-android-phone/
How to make an Android Phone look like Windows 10 mobile?
With the use of various apps, you can make your phone look like a mini Windows 10 PC. The apps that you need to install are Nova Launcher, Nova Launcher Prime, KLWP, KLWP Pro, and Pix Pie icon pack along with Windows 10 wallpaper. Get started with the process by implementing the steps given below:
1. After you install the Nova Launched app, go to your phone settings, then default apps, and then select Nova Launcher to make this app your default launcher.
2. Open the Nova Launcher app and go to its Settings.
3. Tap on ‘Home Screen’ over there.
4. Now, tap ‘Dock.’
5. Disable the dock in your phone by toggling the on/off switch.
6. Press and hold the icons present on your screen and select remove or the x icon to clear your home screen.
7. Go to your Google Drive and download the  KLWP Backup files from there.
It might take some time according to the specification of your Android phone.
8. Tap on the ellipsis menu available on the upper right side of the screen.
9. Select the Download option.
10. After downloading, you will see the option to import, tap on the import button.
11. Tap OK and then open KLWP.
12. Find the hamburger menu in KLWP and touch on it.
13. Go forward by selecting Load Preset and tapping Exported tab.
14. Choose the wallpaper with the label Windows X.
15. Let the KLWP access everything that it asks by choosing Fix Now and Allow every time.
16. Go to the Globals menu by swiping the bottom section of your screen.
17. Toggle on the navbar option.
18. Then, tap the save icon option available at the top.
19. Choose fix and then Select as Wallpaper.
20. In the end, you need to touch the Home Screen option to run the live wallpaper on your Android phone.
Get the feel of Windows in your Android phone by implementing these steps!
Billy Mark  is a creative person who has been writing blogs and articles about cyber security. He writes about the latest updates regarding mcafee.com/activate and how it can improve the work experience of users. His articles have been published in many popular e-magazines, blogs and websites.

5 Best Privacy Settings in Windows 10

With Windows 10, Microsoft has given prime importance to its user’s privacy. You can visit the privacy settings and make your Windows 10 using experience more secure and private. Here’s how you can do the same:

1. Disable your location
If your location is turned on, the location of your device is stored in Windows 10, and all the apps with location permission in your device easily access the relevant data. The best way is not to allow Windows 10 and third-party apps to access your device location. You can manually set the ideal location though by going to Settings, then Privacy, then Location, and then Change button to set permissions and location of your device.
5 Best Privacy Settings in Windows 10
Source : http://retailcard-activation.com/5-best-privacy-settings-in-windows-10/
2. Disable syncing
A lot of data sync from time to time in the Windows 10. Stop syncing everything by visiting Settings section, then Accounts, and sync your settings to turn off syncing. Either disable only sync setting one after one or disable all at once over there.
3. Customize your lock screen
The lock screen of your device reveals a lot of you. You can provide a lot of information about you, so it is better to customize it accordingly. Stop the notification from appearing on your lock screen by clicking Settings, then System, then Notifications & actions, and turn off the Show notifications on the lock screen option. The stranger will not be able to any private information of your device until you unlock the device of yours on your own. Also, you can hide the email address from showing on your login screen by visiting Settings, then Accounts, and then Sign-in options.
4. Disable advertising ID
If you have a Microsoft account, you will have an advertising ID  that offers a lot of information to the company related to you. You see the ads according to your given details in your apps and the operating system. If you want to disable the same, you can turn it off by going to Setting, then Privacy, and then General, and then turn off Let apps use advertising ID to make ads more interesting to you based on your app usage. Though it will not completely remove the ads from your device, it won’t show you ads according to your data.
5. Go with a local account
If syncing is disabled in your device, then there is no need to sign in with Microsoft account in your PC. Instead, you can use a local account that doesn’t demand your email ID. It will stop Microsoft from collecting your essential information. Create an ideal username and password to login to your PC with the dedicated local account. It is effortless to make a local account, visit the Settings section, then Accounts, Your info, and choose to Sign in with a local account instead and read the instructions and follow them accordingly to create a local account. But if you desire to buy apps or want to sync data with Microsoft services, then the Microsoft account is essential.
In this way, you can make the most out of your Windows 10 and stop revealing your personal information with others!
Billy Mark is a self-professed security expert; he has been making the people aware of the security threats. His passion is to write about Cybersecurity, cryptography, malware, social engineering, internet and new media. He writes for Mcafee products at mcafee.com/activate

Thursday, 28 March 2019

Robo-Dogs: Redefining Companionship Smartly

I do not mean to undermine the deep-hearted psycho-spiritual connection that a dog-owner feels for its dog, and nor am I exaggerating the narrative that intelligent robots will replace animal companions in the near future. But, this robo-dog introduced by Tombot Robotics is carving a new realistic approach in affordable caretaker robotics.
Robo-Dogs Redefining Companionship Smartly
Source : http://2norton.com/robo-dogs-redefining-companionship-smartly/
It’s obvious that you will not have to feed it, take it for a walk or deal with the annoying barking, but whether these deletions will level up the pre-destined maneuvers of a robo-dog or will it just present itself as a smart toy is the unanswered question. It is not uncertain that it will provide therapeutic companionship for Dementia and other BPSD impairments in elderly citizens. The buzz by Tombots Robotics that is developing this relatively cheaper robo-dog explains that it was meant to fill the void of caretaker and therapeutic personnel in nursing homes and other counseling homes which help people suffering from dementia like diseases. Robots will come a long way in the future when it comes to filling the void created by lack of human resource.
Tombot’s robo-dog has a hyper-realistic appearance which makes it look like a real dog, although its looks cannot fool one. The robot comes paired with intelligent mechanics that make it feel and behave like a real pup which kindles emotional attachments with elderly people suffering from diseases like dementia and autism. It also has a voice recognition system that listens to user commands and reacts to it accordingly. The robo-dog designed by Tombot provides an all-day function with its battery after it is left for overnight charging.
Tombot’s mission as it says officially is to improve the quality of life of seniors who are suffering from dementia and other relative impairments. Tombot has aggregated some unique artwork by Jim Henson’s Creature Shop and animatronics to help make the robo-dog look realistic.
The spoiler is the fund collection spree that Tombot is pursuing through crowdfunding of which the initial goal has been achieved. It has promised robo-dog’s delivery by August 2020, which is still a long way off and is dependent on overcoming hurdles that it sees on the way.
This is not the first time that a company has come up with a robotic animal companion. What makes this advancement important is its development in a setting where 3D printing and AI are shaping the output. Previously, Sony had released its robo-dog Aibo about 20 years ago, which remains in the beloved memories of its owners. Aibo was revived into a newer version in the late 2017 and remains a fair choice till today. Another company called Hasbro introduced robotic pets- cats and dogs for a small price tag. Robo-pets have been around since long, but a technological tweak and new features charm the frenzy of new age technology spotters.
Billy Mark is a self-professed security expert; he has been making the people aware of the security threats. His passion is to write about Cyber security, cryptography, malware, social engineering, internet and new media. He writes for Norton security products at norton.com/setup.

PUBG Mobile 0.14.5 Update With Royal Pass Season 9

PUBG Mobile Players received a ‘minor update’ on Thursday, and the latest 0.14.5 update brings the latest Royal Pass Season 9. It include ...